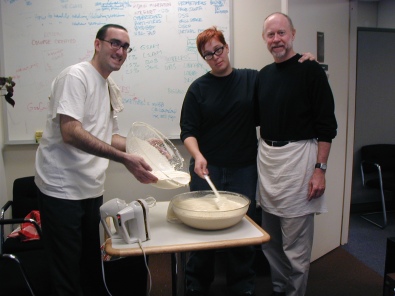
Hold on to your knickers, I’ve got a special guest blogger to help you ring in the New Year with his family recipe egg nog! Twenty years ago, David Keown was a part of my work family. And nothing felt more like family – in that basement-level dwelling with the soft whirring of CPUs, the snow-white glow of fluorescent lighting, and the intense collegiality of friends who had your back at every server outage and script run amok – than Columbia Business School’s IT department with David at the helm. Every year during the holidays, David lovingly entrusted his grandmother’s culinary legacy to us – a legendary egg nog – and combined it with a holiday open house to spread good cheer within the school (and in so doing reassured our community, again and again, that computer geeks can froth with the best of them….).
So without further ado, here’s David…
I don’t remember the first time my parents made this recipe, or where it came from, but it’s always been “the family eggnog recipe.” I have many “growing up” memories of sneaking back to the Santa eggnog bowl at our family holiday parties to have another cup because it was like a thick milkshake…with alcohol!
When I went away to graduate school, I claimed the tradition as my own, and introduced the experience to my community of friends. Years later at Columbia, we hit upon the idea having an open house right before the holiday break, when all the students had gone, as a way of connecting with our constituents. Everyone in the group contributed to a potluck, and I mixed up a super-sized batch of eggnog. The event was a hit, and we made it an annual party.
The key to the recipe is whipping the egg whites and the cream. It transforms the nog from the thin stuff you get in the grocery store to an irresistible treat that gives you a white mustache with every sip. And that keeps people coming back years later asking for the recipe.
Ingredients
“leaded” (=alcoholic)
- 7 eggs
- 3/4 cup sugar
- 1 pt milk
- 1 c whipping cream (if making multiple batches, could do 1.5c)
- 1.5 c bourbon or whiskey
- 1/4 cup rum
“unleaded” (=non-alcoholic)
- 7 eggs
- 3/4 cup sugar
- 3.5 c milk
- 1.5 c whipping cream
- 1 tsp vanilla
The following original method does not cook the eggs. If you’re nervous about raw eggs, you can follow the alternative directions for Phase 1 where everything is cooked.
Instructions
Phase 1: Preparing the egg mixture
- Separate eggs.
- Beat yolks, gradually adding 2/3 of the sugar.
- Slowly add alcohol, beating all the while. (If you’re really ahead of schedule, you can cover this and let it stand in the refrigerator for 1 hour to eliminate some of the “eggy” taste.)
- Add the milk to the egg yolk mixture, whipping all the while.
Phase 2: Whipping and blending
- Whip the cream.
- Beat the egg whites until stiff, adding the remaining 1/3 of the sugar slowly. [NOTE: Less is more. Don’t beat things TOO stiff, or they don’t fold together well. This is particularly true for the cream. They should not peak, but you should be able to scoop it out of the whipping bowl with a spatula.]
- Fold everything together.
Phase 3: Sprinkle with nutmeg when serving
…Alternative directions for Phase 1:
- Combine milk and 1/2c sugar in medium saucepan and bring to a boil over high heat.
- Remove from heat and let mixture steep for at least 20 minutes.
- Return the mixture to the stove over low heat.
- Prepare an ice bath in a large bowl.
- Separate eggs.
- Whisk the egg yolks in a medium bowl until pale yellow.
- Slowly whisk the warm milk into the yolks, then return the mixture to the saucepan.
- Cook the mixture over medium heat, stirring constantly with a wooden spoon until it is slightly thick and coats the back of a wooden spoon. (10-15 minutes, temperature must reach 160 degrees. Do not let it come to a simmer.)
- Stir in 1c of boubon then remove from heat.
- Transfer the mixture to a medium bowl and nestle it in the ice bath.
- Whisk until the mixture is chilled, about 5 minutes, then stir in the remaining alcohol. Can be kept in the refrigerator for a day.
